How to Change the Margins in a Microsoft Word Document
Matt Cone February 14, 2021 Tutorials Mac Apps
Creating a document in Microsoft Word for Mac? Depending on who you’re creating the document for, you may have to change the document’s margins. Many organizations such as schools and legal entities have very strict guidelines regarding the margins.
![]()
Here’s how to change the margins in a Microsoft Word document on your Mac:
Open Microsoft Word on your Mac, and then create a new document.
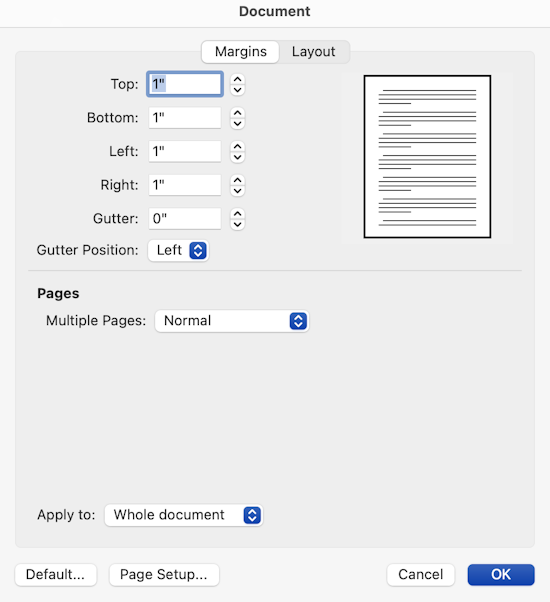
From the Format menu, select Document. The window shown below appears.

Change the values in the the Top, Bottom, Left, and Right fields to adjust the margins. By default, all values are displayed in inches.
Click OK. The margins in the open document will be changed.
That’s it! You’ve successfully changed the margins in your Microsoft Word document. When you save and the print the document, it will have the correct margins.
Related Articles
- How to Add Page Numbers to a Microsoft Word Document
- How to Show the Word Count in Microsoft Word for Mac
- How to Double Space Microsoft Word for Mac Documents
Subscribe to our email newsletter
Sign up and get Macinstruct's tutorials delivered to your inbox. No spam, promise!