How to Burn a Music CD in iTunes
Matt Cone December 18, 2011 Tutorials Mac Music
iTunes is one of Apple’s most exciting and practical applications. It allows you to collect and catalog thousands of songs, television shows, podcasts, and movies - and its interface is simple enough for everyone to understand. But don’t let the sleek and shiny appearance fool you: iTunes is a powerful piece of software that is capable of much more.
Burning your own music CDs with iTunes is fun, fast and free. It’s also one of iTunes’ best features! By taking songs stored on your Mac and arranging them in a playlist, you can create custom CDs for friends, family, and yourself.
Here’s how burn a music CD in iTunes:
- Open iTunes. (It’s in the Applications folder.)
- Create a new playlist and select it, or just select an existing playlist. (For instructions, see How to Create an iTunes Playlist.)
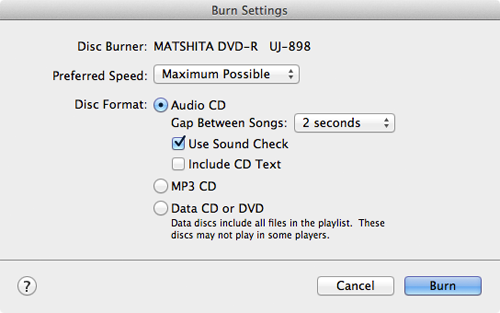
From the File menu, select Burn Playlist to Disc. The Burn Settings window appears, as shown below.

Select Audio CD. This tells iTunes to create a regular music CD that can be played in any CD player.
Select the Use Sound Check checkbox. This feature automatically levels out the volume of every song on your CD to ensure you’re not “blown out” by songs that were recorded at a higher volume than others. Be sure to enable this if you want all the songs on the CD to play at the same volume.
Click Burn.
iTunes prompts you to enter a blank CD, as shown below. Put one in your Mac’s CD drive.

iTunes burns the CD. You can watch the progress in the iTunes status display, as shown below.

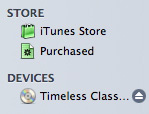
You’ll know iTunes has finished when your new CD appears in the sidebar, as shown below.

You’re all done! Now you can eject the CD and enjoy your music on any CD player.
Related Articles
Subscribe to our email newsletter
Sign up and get Macinstruct's tutorials delivered to your inbox. No spam, promise!